Showing posts with label Sarah Hurley Silhouette Files. Show all posts

Friday, 1 May 2015

Silhouette Scrapbook Page

Hi, it's the first of the month which means it is my turn to share a creation over on the Sarah Hurley 365 Blog and today I am sharing a Scrapbook Page I made using Sarah's Circle Chevron Page Mat.


Full details are over on the blog and I would love it if you could pop over and have a read.

Have a great weekend, Carol xx

Tuesday, 24 March 2015

Organiser Box

Hello, it's my turn over on the Sarah Hurley 365 Blog and I am sharing an organiser box I made using Sarah's Silhouette FilesStamps and Washi Tape. Full details are over on the blog.


Ingredients
Stix2 Adhesives

Thanks for popping by! Carol xx

Tuesday, 24 February 2015

Silhouette Scrapbook Page

Hi, it is my turn over on the Sarah Hurley 365 Blog and I am sharing a Scrapbook LO I made using some of Sarah's Silhouette Files.


Full details are over on the Sarah Hurley 365 Blog and I would love it if you could pop over and say hi!

Thanks for popping by, Carol xx

Friday, 20 February 2015

Cameo Cards

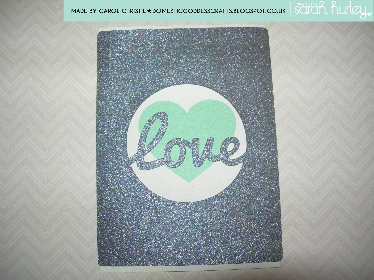
Another make for my Sarah Hurley 365 Blog Post were these love themed cards using my Cameo machine.


Full details are over on the blog.

Monday, 3 November 2014

Make a Date.

Hiya, can't believe it is the 3rd of November and I am so behind with blogging. 

Here is my latest make for the Sarah Hurley 365 Blog and full details of how I made it are on the post.


Thanks for popping by, hope to see you soon as I play catch up, Carol x

Wednesday, 8 October 2014

It's been a while!

Just realised it has been over a month since I last blogged, so brace yourselves I have lots of new things to share.
I will start the catch up with my February PL Page. I am loving PL as I can do lots of different things on one project. In this one I stamped, embellished, punched and used my Cameo.


Ingredients
Heart Doodle Corner by Sarah Hurley at the Silhouette Store
Love Journalling card by Sarah Hurley at the Silhouette Store

This was made for a challenge over at the Sarah Hurley 365 blog. The new challenge is currently Halloween and we would love it if you could join in with our final challenge on the blog.


Friday, 5 September 2014

Buttons!

Hello, it's the 5th of month which means it is time for a new challenge over at Sarah Hurley 365 and the theme is "Buttons".

I am just loving all the gorgeous new designs Sarah has launched over at the Silhouette Store and I used one of them to make my card.

This Circle Steampunk Cogs Page Mat is designed for a 12x12" page LO, but I resized it to 5x5" and it worked perfectly. Even though the design is very intricate and detailed, it still worked beautifully when resized. I popped buttons onto the cut out shape.

I used lots of 3d foam and placed it onto a piece of chevron card from an AFOMFT kit. I used the "Curio" stamp from Sarah's latest range for Personal Impressions


Ingredients
Curio Stamp set from Curio Stamp Set
Pearlised card, card blank and buttons from stash.

Thanks for popping by today, we would love it if you joined in with our challenge this month.

I would like to enter the following challenges;
Craft for the Craic - Something with circles
Crafts 4 Eternity - Digital(Cameo die cut)
Crafty Catz - One for the boys
Crafting Musketeers - Use buttons
The Crafting Cafe - Shades of one


Tuesday, 8 July 2014

It's time to celebrate!!

And what better way to do it than to make beautiful things to commemorate it. The Sarah Hurley Designs challenge is 4 years old this month and we are hosting a Celebration Themed Challenge.

I decided to make a baby card for a complete change! I am loving the different styles of journalling cards Sarah has over at the Silhouette Store and used the Baby Journalling Card as the main focus of the card. I stamped some tiny clusters of stars from the Doodle Doll Stamps and stamped them round the card with VersaMark ink then clear embossed them. I distressed the card using Worn Lipstick and Shaded Lilac Distress Inks. I cut an extra journalling card, and removed the baby word, distressed it with Black Soot DI and placed it on the chevrons. I popped the journalling card onto some 3D foam to give the card some dimension.

I used the Chevron Background Stamp, which I inked with lilac and pink pearlescent Brilliance inks, then covered with clear embossing powders and heat sealed it. Such a great look for not an awful lot of work. I really love inking this stamp up with different colours, it always looks great for a large background.


Ingredients
Brilliance Inks
Distress Inks
Clear Embossing Powder

I really hope you can join in with our Celebration Challenge this month. See you soon, Carol x

I would like to enter the following challenges;
Ladybug Crafts Ink - Baby
CCC Digi Creations - Digi/wet or dry embossing (journalling card is a digi file)
Savvy Handmade Cards - Reach for the stars
Cute Card Thursday - Reach for the stars

Friday, 18 April 2014

It's Almost Easter.

Hi, it's Good Friday and I thought I would make something to reflect the time of year it is.

 I was lucky enough to be treated to a Cameo electronic cutting machine a few months ago and I still have the new machine "fear" and realised I really had to use it rather than just download lots of Sarah's yummy files.

I thought I would make a card using one of Sarah's new designs and chose the  Easter Page Mat. When you open in onto your "Drawing Area" it opens as a 12"x12", but that is easily sized down and I will try and explain how I did that.


I wanted to use a 6"x6" card, so decided to make the cut out 5.5", to do this I selected the whole image, clicked on the Scale tool, typed in 5.5" and ticked the lock aspect option.  It resized it perfectly to leave me with this. 


I was feeling confident, so decided I wanted to layer the cut out, and knew I could do it easily using the Offset tool.  I wanted it to just have a nice frame, so chose 0.1" as my Internal Offset. The result was this;


You may be wondering why I am working on the right hand side of the page...this next step will explain that. I clicked on the internal image, and dragged it over to the left of the page. That way I could do the two cuts on one pass through, and use two separate colours of card;


I sent them to the Cameo to cut, then went about picking out matching backing paper and some sparkly bits. Et voila, here is the finished card...taaa daaaah!!


Ingredients

I hope this shows that once you overcome the new machine fear, you can have lots of fun making pretty things. 

Remember there is still time to enter our Challenge this month and the theme is Stitching - Real or Faux.

Have a great Bank Holiday Weekend, and a lovely Easter, Carol xx

I would like to enter the following challenges;
4 Crafty Chicks - Sentiment only, no pictures.
Sassy Studios Designs - Here Comes Peter Cottontail
Little Red Wagon - Easter Parade